VR Studio 3.0 Tutorial
I have been planning a more in depth coverage on the VR Studio 3.0 and all of its features, and with Pose Fair about to begin now is the perfect time.
I will be working off the complete package, that includes the VR Studio Posestand, the VR Studio HUD, the VR Studio Library and all the extras. The HUD and Posestand are available separately as well, but I could not function without all of it.
Posestand:
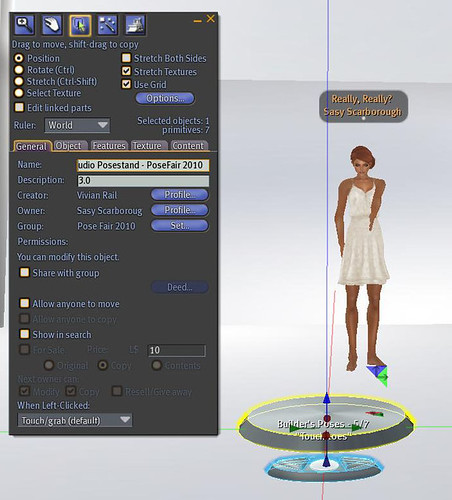
When you first rez the stand it will ask you to allow it to link and delink from other objects, the button to press is yes. This will allow the stand to link new libraries to itself.
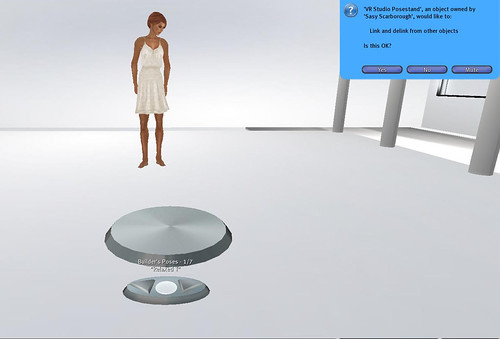
If you have an older version (updates are free) then you will be used to just filling the contents of the stand. That is no longer how it is done. To streamline the whole process, and to save you having stands all over your house, each stand now has the ability to rez libraries, so that it keeps all of your poses organized by designer or style in the one stand.
I always start out by naming the VR Studio Posestand to stay organised. I just add to the end of the name already in the stand, that way it is easier to find in inventory. This stand is for Pose Fair 2010.
Now for setting up the stand with poses 🙂
The Libraries are as easy as drag and drop poses, and type a name in the description, DONE!
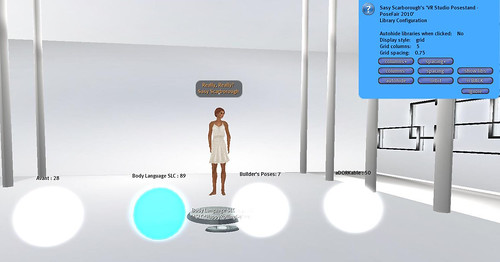
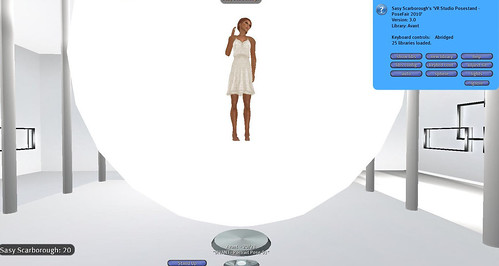
First you click the stand and click the show libraries button.
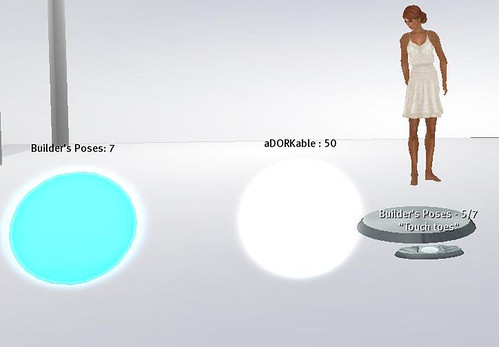
This will show you which libraries you currently have in the stand.
This is a new stand, so the only library in it is the one that comes with the VR Studio “Builder’s Poses “, it is a set of poses made for builders and designers the creator of the VR Studio made to help with checking for all sorts of things a designer needs to check before releasing, as well as poses made to build attachments on the body.
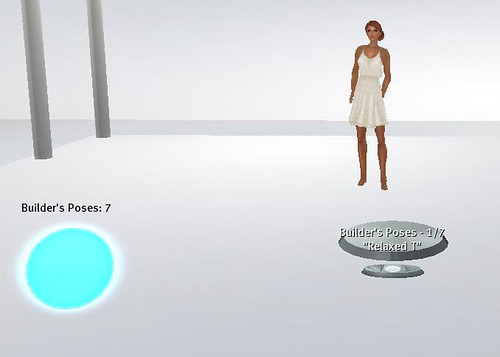
While the library is blue, that becomes the functioning library for the stand, so however many libraries there are, you can pick which one by just clicking on the library (there are a few ways to do this with the complete VR Studio Package ).
When the ball is clicked on you have the ability to choose whether it stays out, or whether you want the stand to auto hide all the libraries.
Because I just went to the fair, I have many new to me Pose creators, and some older ones as well. But I am going to start a brand new stand that I can use during the Pose Fair to blog with, knowing that all the poses in it are at the fair.
Clicking on the VR Studio posestand will give you the same menu as previous, this time choosing New Library.

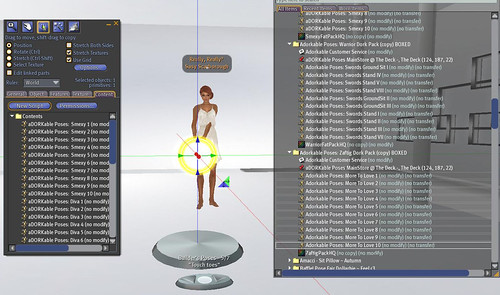
Now that you have a new library rezzed you can drag your poses into it in edit mode. At the moment it is unlinked.
I load up all the aDORKable poses from the fair into the library contents, then click the first tab on the edit dialog to type in the library name in description field only.
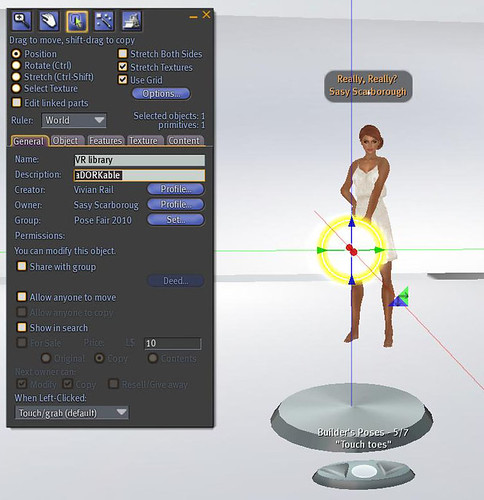
Once you have done those two things, click the glowing white ball.
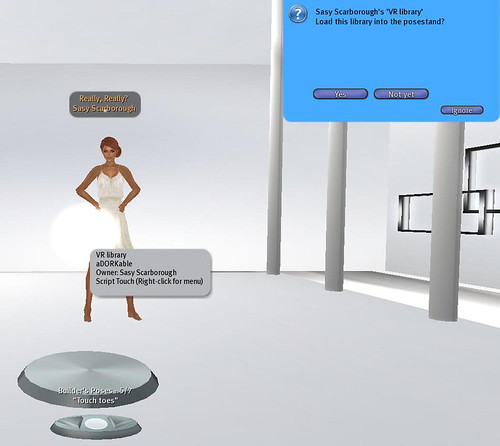
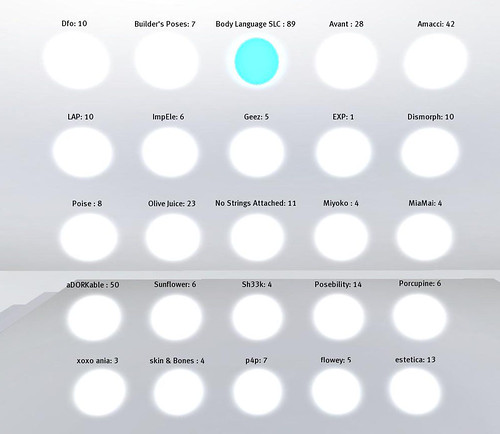
Once you say yes the library will link and put itself inside of your stand. You can check to make sure all went according to plan by clicking the stand and choosing Show Libraries. This will rez the libraries you have so far, with the names and the amount of poses you have in each library.
The library that the stand is working from is always the blue one, you just click on whichever library you want to change that.
You can proceed to make more libraries, by clicking the stand again, and pressing New Library. Keep following the same steps each time until you have as many libraries as you need.
While building your libraries you can use the Library Configuration button that is on the menu you get when clicking the stand. This goes to a new menu that lets you choose how far apart you want your libraries, what number of libraries per row you want, and numerous other ways to set them up. It also has an auto hide button that you can have on or off. Off means that the libraries will stay showing as you change between them, on means all libraries will hide again in the stand if one is clicked.
I wish I had a timer set to show you how fast that was, even with unpacking etc.
Now that you have all of your poses set up into by store name (some people may prefer to do them by types, such as stands, sits, walks etc. I did that for an AO making tutorial you can see HERE) you will notice that they are all linked together, that is what giving permissions for at the start does.
If you need to add poses to your libraries at any time, it is as simple as clicking show libraries in the menu, and then in edit making sure edit linked parts is checked and clicking on the library you wish to add more poses to.
Clicking on the menu again I chose library configuration and set it to auto hide the libraries when selected again. Now they are tucked away and we can move on to the other features.
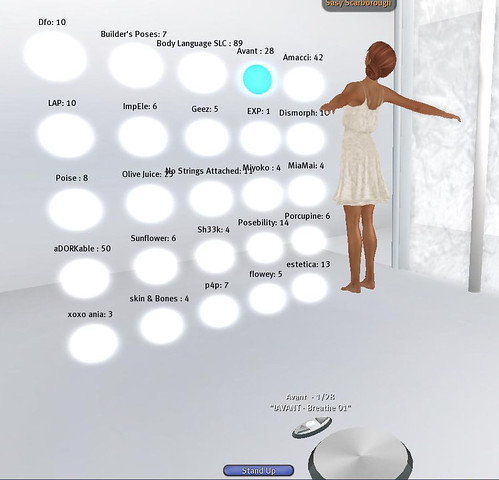
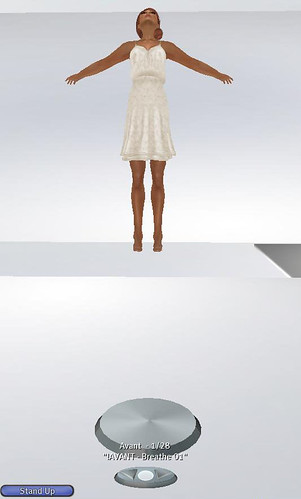
Now we can go to the features that were in the previous releases of the VR Studio.
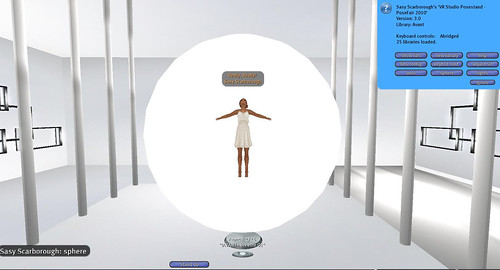
Sphere: This rezzes a perfect sphere around your avatar. You can see into it from 360 degrees but you cannot see out of it, perfect for taking pics from any angle. You can get the sphere to rez by either typing in chat, or using the menu and pressing sphere button. This also means that others can rez it around a model if afk or an alt used for pic taking.
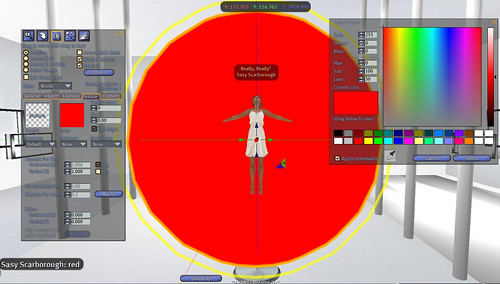
You can use edit or chat to tint the sphere to any colour you like, as each time you rez a sphere it is a brand new one, you do not need to worry about making a mistake, or using a texture on it. Either tint or texture will only do the inside of the sphere.
When wanting to use a texture background for your pictures just drag onto the sphere and it will only texture the inside (remember you cannot break it) The texture used in this example was created by Cajsa Lilliehook .
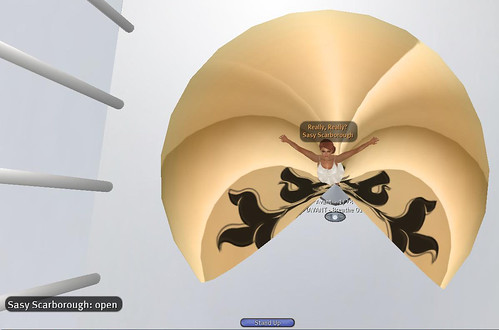
Using an aerial shot so you can see properly, you also have the option to type Open in chat, and that will open a large wedge of the sphere allowing you to texture the inside if you do not feel comfortable dragging and dropping, or also so that you have easier access to your avatar if you need to edit your worn prims.
Then typing close with return it to the full sphere. To remove the sphere just type Sphere again in chat or click on the sphere button on the menu.
There are different ways to change poses, you can use the arrows on the stand, left or right is previous or next pose, you can type a number in chat, and it will immediately change to that pose index, or you can use the menu and click on auto and this will change the poses with a delay of however many seconds you want. That option is great for modeling in a store. I sometimes use that feature just to watch them if they are a new set, and to find inspiration within older ones. Another option is keyboard controls, you can activate those using the menu and use your left and right arrow keys on your keyboard.
Adjust sit:
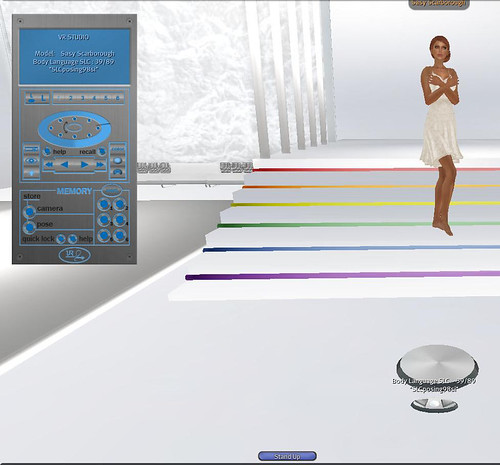
This is a new feature of VR Studio 3.0 allowing you to get as close to the ground as needed or as far away, or better yet, when you want to line up your poses against something in world, such as a railing, or stairs etc.
Here you can see that I rezzed the stand at the bottom of the stairs, and then using the menu and my arrow keys and page up and page down I was able to put myself in a different part of the room. This is perfect for location shoots also when you don’t have mod rights on items, no more sinking your stand into the floor etc. Then a quick click of the reset button and you are back over the posestand.
Bringing myself down closer to the ground I am also showing that you can just type hide or show in chat to have the posestand go invisible and reappear when needed.
Lights:
The VR Studio 3.0 as well as previously has 6 perfect lights inbuilt, by typing lights, or clicking lights on the menu, you can rez or derez them to work for you. Do not wear a facelight while using these as only 6 lights are possible in a scene at once, so you will cause shadows to appear on your body if you try to.
VR Studio 3.0 HUD :
This has so many functions, and believe it or not you will find uses for it , I have used mine for shooting movies as well as security for the places I have worked.
A quick run through as the interface has changed a bit since the last release.
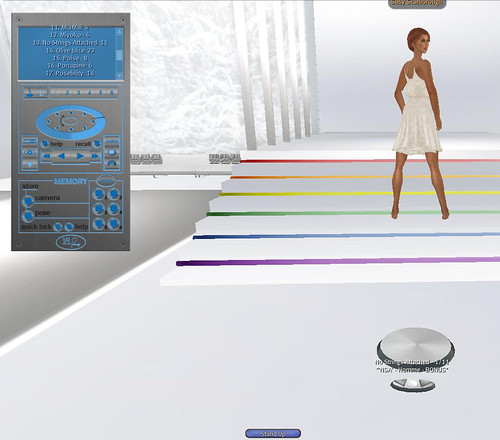
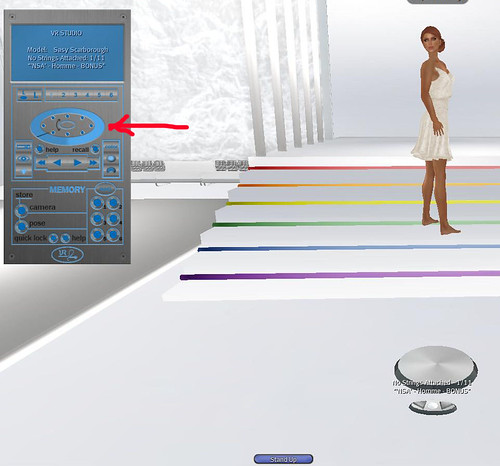
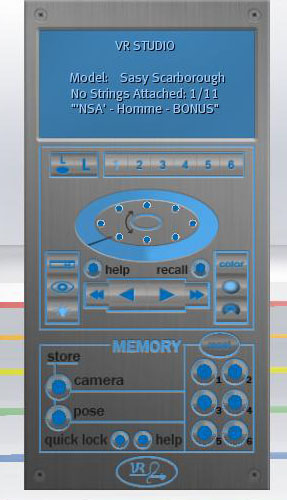
The HUD will appear on the top left of your screen, new features are that even minimised you can change poses forward and backwards with the right and left arrows. You can also Rez the libraries using the L button, and the R button is a recall button to last pose used, if you skip forwards by number and want to use the one you used last.

The libraries button will light up when libraries are rezzed. To use the full HUD click on the VR Foundry logo on the right and it will open on your screen.
To get your VR Studio HUD to control your VR Studio posestand (or other peoples, as the HUD will work on anyones VR Studio posestand) you must first link them to each other. This is done by either typing “link” in chat when someone is on the posestand, or by pressing the circle button between the two arrows on the actual stand. This will assign the stand to a channel the HUD communicates with. Once linked, a blue drop down will appear letting you know what number it is linked to on your HUD, and you can make sure that is clicked on and lit up. Two extra channels have been added to this release, so now you can control up to 6 individual stands per HUD, this makes photo shoots a breeze for photographers since they can do it all from the one HUD.
Once you have linked all the info appears on the blue screen for your convenience.You can see which model is on the stand, what library is in use, the number of the pose and the name of the pose. All that information can come in handy for many reasons.
Another way to access the libraries is the L button closest to the channels, this will change the screen to show you all the libraries which you can scroll and when you click on one it changes to that library.
Clicking on the L again will return it to it’s previous info screen.
Rotation has been changed in this version also, now the avatar moves not the stand. Using the black line on the blue gradient circle you can move the model (in this case me) in small turns or full turns, depending on where you click. The small dots are fixed settings , and the middle circle is an auto rotation that will keep going until you click on it again ( useful for models in showrooms of stores ) .
The next buttons I will explain left side first, top to bottom.
Left Side
Keyboard Control button: This button allows you to control the pose changing using your camera controls, Clicking it on will light it up, make sure you turn it off when finished or your movement in world will lock up because your HUD will be in charge.
Eye Button : This is Hide and Show for the posestand. Clicking on or off will hide or show the posestand.
Lightbulb Button : This will rez and de rez the lights.
Right Side
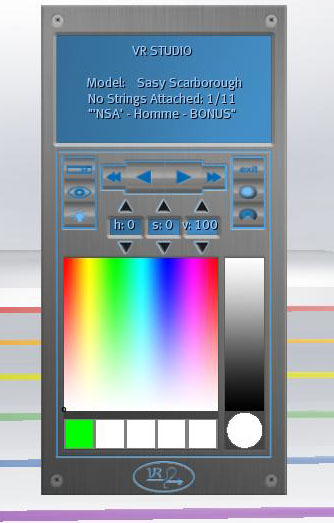
Color Button : This will rotate the HUD ( to be continued)
Sphere Button : Will rez and derez a new sphere
3/4 Sphere : Will open and close part of the sphere as explained previously
Middle Buttons
Double Arrows Left : Changes poses by ten poses at a time backwards
Single Arrow Left : Goes backwards one pose at a time
Single Arrow Right : Goes forward one pose at a time
Double Arrows Right : Changes poses by ten poses at a time forwards
Help button will give you a notecard on all the functions of the HUD
Recall Button will go to previous pose used, this is useful if you use chat to change poses by hundreds ( some of us have big pose libraries )
Color Button Continued : When you click it it will rotate the HUD and you get a interface that allows for easier tinting of the sphere, this also makes it really easy to access RGB values on colours, and match colours to backgrounds you may need for cleaner images.
You also have your user buttons and screen on this side so that you can still use it this way. You can also store a colour you may like by holding your mouse down on the circle and then onto one of the preset squares.
Back to the front of the VR Studio HUD.
MEMORY :
This has always been a huge stand out function of this system since it’s first release a few years ago. Some changes have been made to make it easier.
I use these functions often, and it saves so much time and can really add to your options of planning a pic. I have often used it to take multiple pics of myself on location so that I appear to be more than one girl in the picture. Most recent example of that would be in this post, all of those pics with the three girls are all me using this part of the HUD .
Camera Button : This memorises camera position.
Pose Button : This memorises the pose you are using.
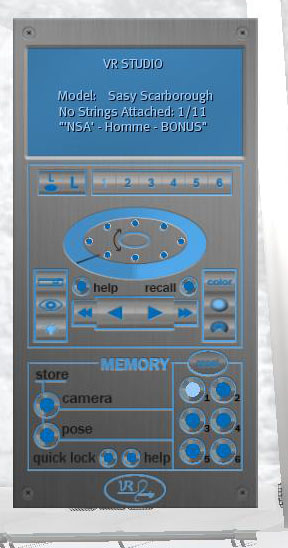
Numbered buttons : These are what you click after you click camera and or pose to store the memorised aspects into the HUD. You can then use them over and over again for one post or many. You can also log out and come back to the same position days later. Great for skin vendor pictures. To change a stored memory spot just write over it (store a new pose or cam in it) or you can click and hold to erase it.
Quick Lock : A single click on this will lock in your camera position with or without a posestand. You can clear it by clicking and holding on it just like the other memory buttons.
An example of the HUD being used by one to control many would be the movie I made with the girls HERE , all they had to do was change clothes, I controlled their poses and walks all with the stands using my HUD, the stands were able to stay hidden.
VR Studio Mobile Library :
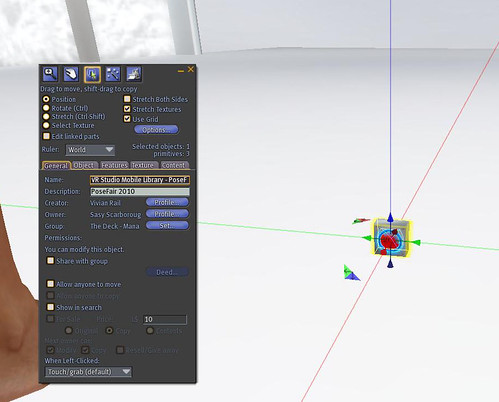
Rez the VR Studio Mobile Library on the ground rename it same as you did with the pose stand, this time adding to the description field also.
Fill it with poses, stands or animations, whatever you want to use on location. It comes preloaded with the builder’s poses, which you can keep or delete.
Once you fill it you can pick it up and wear, this will put it on the top of your screen.
The use of the Mobile Library is so that you can still pose with control if rezzing is not allowed, but scripts are. Here I am using the Mobile Library on its own, using chat to choose which poses I want randomly. The large green circle is red when off, click on it to turn it green so it works.
You can also link to your VR Studio HUD for silent control. No need to chat, and definitely no text appears, so people aren’t bothered by your gadgets. As you can see from the pic, you cannot rez here but you can run scripts yay mandala lol.
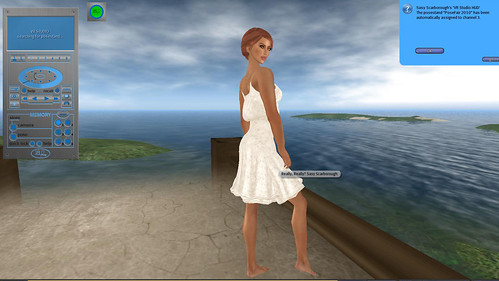
Link by clicking the blue ring on the Mobile Library, and that will give you a drop down telling you which channel on your HUD it is linked to.
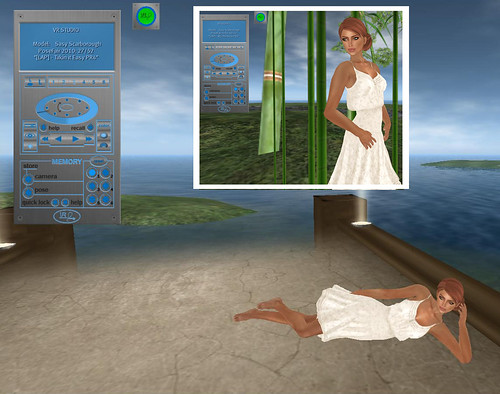
You just never know when you may need to lay yourself down outside a jewelry store. Because this is all HUD controlled too, you aren’t causing a disturbance by having rezzed prims etc, and if someone turns up you just click the green button so you quit the pose your doing.
The VR Studio Mobile Library is fantastic not only for uses in this way, but you can also broaden your experiences with it. For instance I have loaded one with hundreds of AO Stands in the past, and when spending a long time in one location have turned that on instead of my ao , so that I am not just cycling through the same five stands. When working in retail in SL that can do your head in, you can also set auto to as long you as you like, so your stands can take five minutes to cycle if you want.
That is as much as I can think of right now to get you started using your VR Studio 3.0. I honestly couldn’t function in my day to day without mine. I use it for so many things, the HUD especially, and to be able to run from my stands to my friends and them to mine, just linking our HUDS and away we go is so much fun.
You can get your VR Studio kit at VR Foundry MainStore or VR Foundry @ The Deck (if not adult verified )
What I am wearing :
Click HERE to TP to the stores
Spring Sway Sundress in Marshmallow – Surf Co. ( more to come later today on that release )
Ife Skin – LeLutka
Summer Hair – Fri.day
Poses featured : aDORKable, Body Language, No Strings Attached, LAP available at Pose Fair 2010
